


Step up your floral background stamps
- Rachel Designs

- Jul 11, 2025
- 3 min read

Hello again friends!
I'm back on the blog with some ideas to create some extra interest in your projects with your floral background stamps.
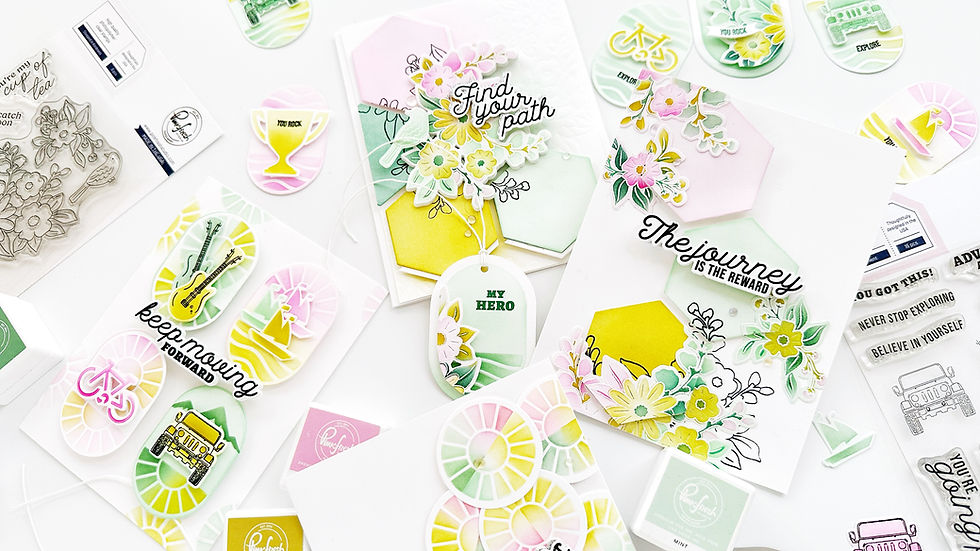
For todays's cards I'll be using the gorgeous Garden Medley cling stamp from Pinkfresh Studio along with its coordinating stencils and die set.

These are the steps to create this card:
Stamp your cling stamp onto an A2 side panel and color these images with Peony, Begonia, Marigold, Grassy Knoll, Olive, Summer Shower, Seaside and Atlantis.
Cut out this stamp, first with an oval die set, I used the Nested Elongated Ovals Blanket Stitched die. Then cut out this image again with the Garden Medley Coordinating die and foam mount it onto another white oval diecut for more stability.
Cut out an 8 1/2 by 5 1/2 panel for your cardbase and score it at 4 1/4 and then at 2 1/8 from the left hand side.
Dry emboss one of the flaps of your easel card with the Petal grid press plate panel.
Add glue to back of your oval but only on its right side and adhere it to the flap of your cardbase.
Adhere some leftover flowers on the upper right and bottom left corners of your card front.
Stamp your sentiment with Detail Black ink. I used the Basic Banners Everyday Stamp and coordinating die.

For my second project I used a different color combo:
Color your Garden Medley stamped image with your coordinating stencils using: Sweet Mustard, Candy Apple, Passion Fruit, Peony and Candy Apple.
Cut out this background with the largest hoop of the Embroidery Hoop die and then cut it out.
Foam mount it onto another circle die and foam mount the hoop die on top. I colored my Hoop diecut with Peopy.
For your cardbase: Cut out two A2 side folding cardbases. Cut out 1/8 inches out from one of them and then adhere them to create this gatefold card.
White heat emboss your Garden Medley stamp with Hero Arts White Satin Pearl embossing powder onto another A2 note card. Cut it out with the coordinating die, cut it in half and adhere them to the flaps of your gatefold card.
Foam mount your hoop die adhering it only to the left flap.
The sentiment is also from the Basic Banners Everyday stamp and coordinating die.

Finally, these are the steps to create my third card:
Follow the step no. 1 from the first card.
Cut out an A2 top folding card base; scor it at 5 1/2 and then at 2 3/4 from the left hand side to create a top folding easel card.
Cut out your images with the coordinating die and the cut out about 1 inch from the bottom..
Ink blend the bottom part of your easel card with Summer Shower ink.
Adhere your images to the bottom part of your easel cardbase.
Add your sentiment from the Basic Banners Everyday stamp. I backed it up with an additional banner die cut out of silver glitter cardstock.
You can also decorate the inside of your card with some of the flowers we cut out and add another sentiment to secure the card when it is open.
I hope you give these ideas a try and thank you much for stopping by!
Have fun creating!
Raquel


Comments