


Delighted for you
- Rachel Designs

- Apr 30, 2024
- 3 min read
Updated: May 20, 2024
Hi again friends!
I'm back on the blog with a colorful floral design that is part of Pinkfresh Studio Delightful Release:
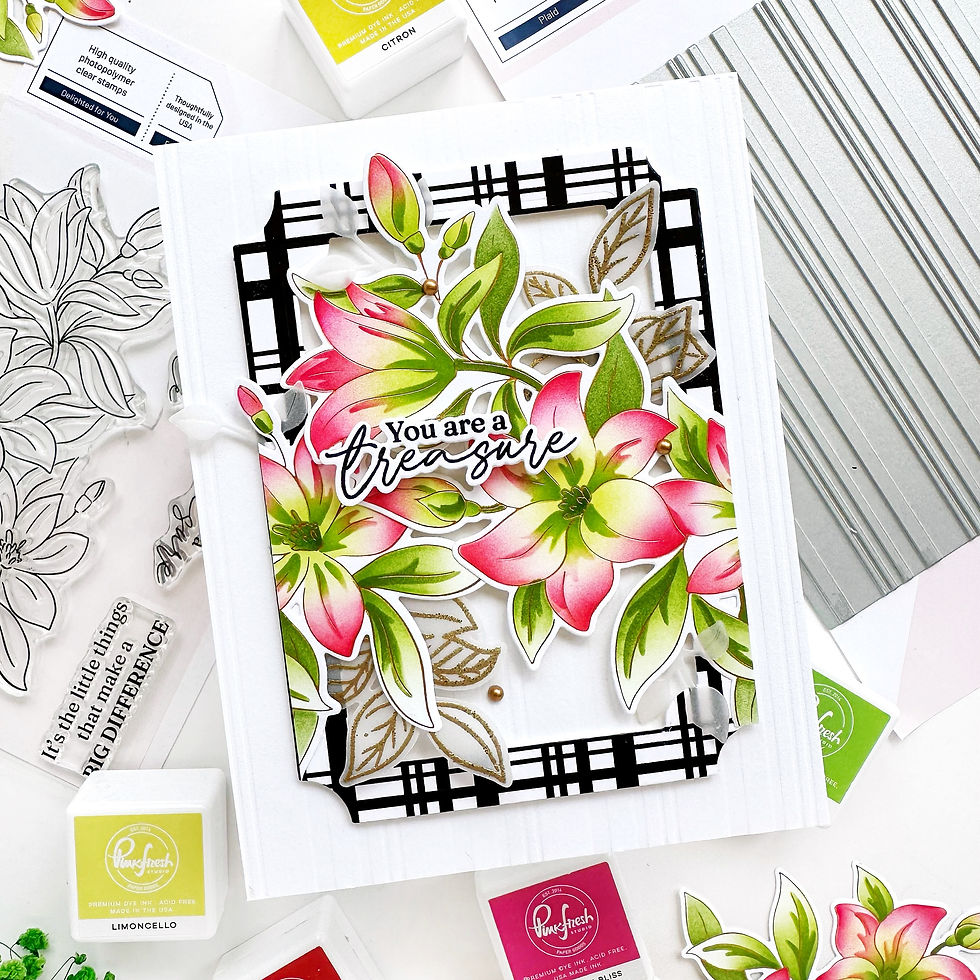
I fell in love with this set the moment I saw it. These gorgeous lillies are screaming color and being quite a large flower, I couldn't help but mixing some colors. This is what I love most about sets like these, the versatility they have when it comes to coloring.
I used Pinkfresh Studio Delighted for you Press Plate with Matte gold glimmer foil. The press plate works beautifully with glimmer foil and I have never had a problem of overfoiling.
I pulled out the coordinating layering stencils and took my time to create this beautiful blend of colors:

I knew I wanted the center flowers to be green and the edges of the leaves red or pink or a mix of both, so I started adding some Limoncello ink in circular motions going slightly towards from the center of the flower the petals. Green and red or green and pink doesn't look good when mixed so that's why the center of the petals are lighter. Once the center area was colored I intensified the green shade with Grassy Knoll. Then I colored the petals in the opposite way: from the tip of the petals to the center of the petals applying less color as I went in. Sometimes you don't have to even ink up your blending brush; the remaining ink is more than enough for the first layer.

For the petals I used: Raspberry Bliss and Candy Apple with a very light hand. It's important to map the area where you want to apply your ink first and then slowly instensify the color. It might seem to be a very time consuming process but I can assure you it is not. Once you have your first flower colored the rest is pure joy. I always come back and add a little bit more Candy Apple ink or Raspberry Bliss ink...it's just a personal preference.

There is a particular Stencil for the center of the flowers so being my center already green I went with Olive to make that center more visible.
For the leaves I went with just two simple layers: Grassy knoll first and then applied Olive to the veins of the leaves. Remember to always apply more ink on the base of the leaves with your first layer.
Once the image is colored and cut it out with the coordinating die and dry embossed my front panel with the amazing Plaid Press Plate twice to achieve the plaid look and to add some texture. I used Spellbinders Cotton paper. I decided to add even more texture creating a frame with the Notched Corner frames so I also had some contrast with my usual white background. I could have easily applied the Detail Black ink to the plaid press plate but I used black glimmer foil instead. Once I had my first plaid pattern foiled, I rotated my foiled paper 90ª, add more black foil onto the press plate and run it through my die cutting machine. This create a complete foiled image.

Finally, I stamped my sentiment from this same set with Detail black, applied some clear embossing powder and foam mounted on my card.
I added some vellum leaves from the Leafy Branch die , some gold heat embossed leaves from the Fluttering Butterflies Stamp and Matte Gold Metallic Pearls.
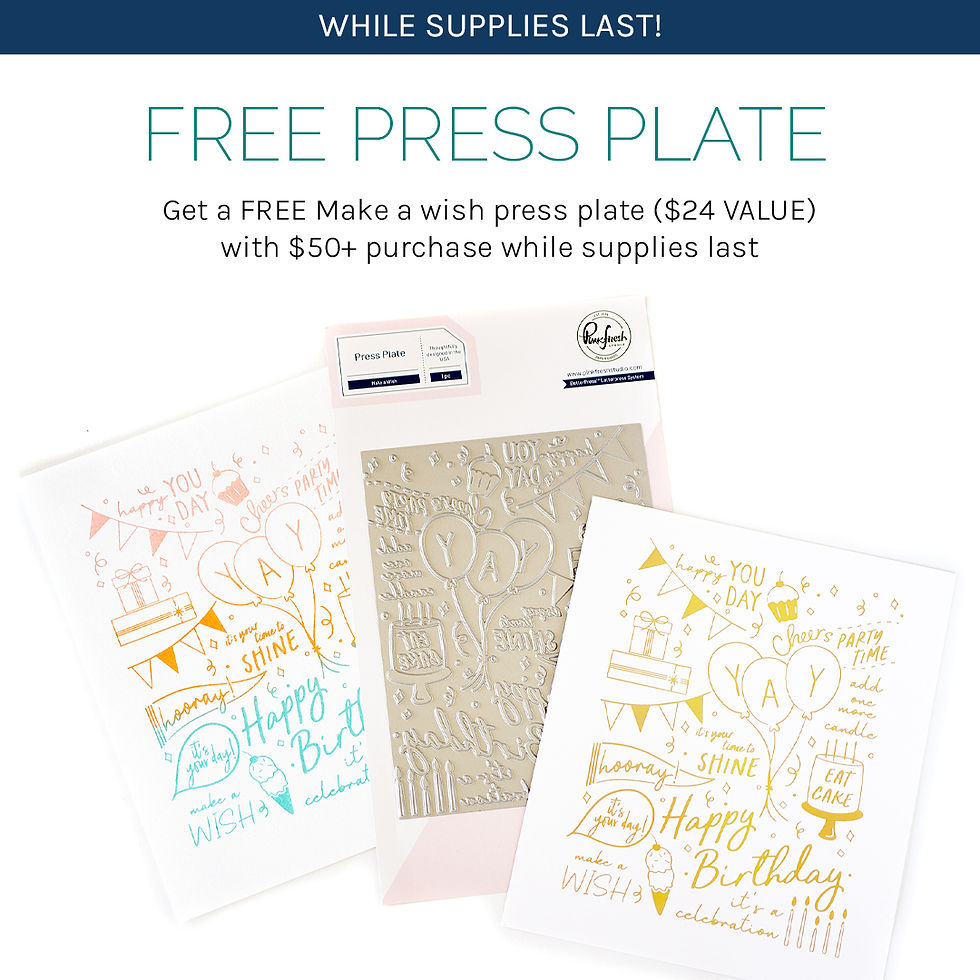
I also wanted to mention Pinkfresh Studio is celebrating their 10th year anniversary this month and there is an amazing freebie for the release. It's A2 sized press plate called Make a wish. This freebie will be added to your cart without adding any coupon code. It will show up for qualified to $50+ orders purchase while supplies last.
I hope you try these ideas if you haven't already and have fun creating!
Thank you so much for stopping by...
Raquel


Beautiful! I love the two tone blooms!
Love the Delighted for you set! Great release! Beautiful card! Muy Linda!!!